Journal

Logic Pro X – Alchemy Issue

When Apple’s Catalina OS update hit, it spelled disaster for many creative types like myself. All of a sudden countless plugins I relied on weren’t working with Logic, and half the time I couldn’t even get Logic to open as it was getting hung up scanning for these now “faulty” plug-ins.

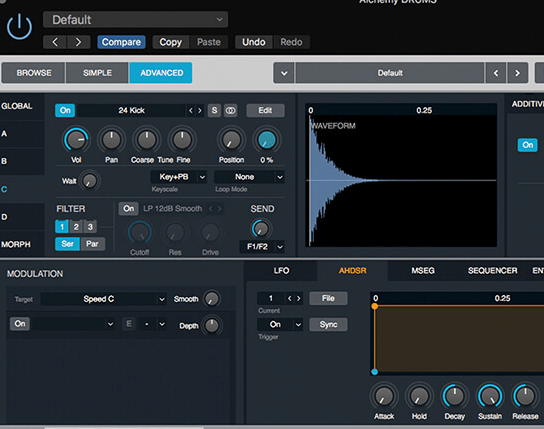
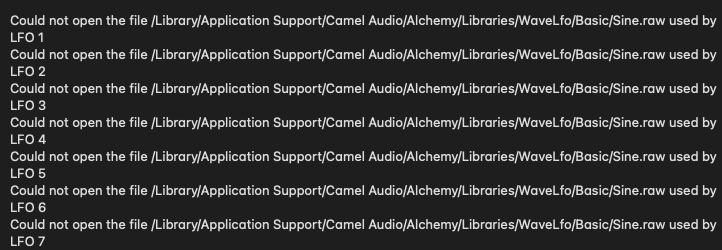
I finally got things straightened out with my 3rd party plug-ins (and unfortunately had to ditch some altogether), but now I was experiencing strange issues with Alchemy- a very powerful synth/sampler housed within Logic. Whenever I would open a project, I would be slapped with seemingly endless dialogue boxes telling me that there were specific LFOs necessary to Alchemy that couldn’t be found. The boxes would take me to finder windows and request that I manually locate said files. I attempted everything I could think of to fix this issue with no luck.

Finally, I broke down and called Apple Support. GUESS WHAT: they had no idea what was going on either. Perfect! Just my luck…I spent a couple hours off and on the phone with one super helpful tech that ultimately led to our discovery of the root problem. It turns out that some old files associated with Alchemy (from when Camel still owned it) were not delete don my Mac when a newer Apple/Logic version was installed- this was back in 2013, and the problem FINALLY was rearing it’s ugly head. So if you’re having this issue, here’s your fix:

There is an old component (Alchemy.component) that needs to be deleted. Path:
/Library/Audio/Plug-ins/Components 

This will immediately fix the issue. The version for this component was listed for me as: “Alchemy 1.55.0, © Camel Audio 2012” and it showed it was last modified in 2013. Yours might be a slightly different version number depending on when your Mac last updated before moving Alchemy to Apple’s ownership.

Happy Alchemy creating!

iPhone 6s Stand for Mackie Big Knob

After years with my trusty iPhone 6s, I decided it was time to upgrade. My phone was at the point where anytime I needed to use an app, another one would have to offload first. Super annoying. Calls and texts with my wife would often not come through either, so THAT was definitely an impetus to upgrade. But what would become of my old partner in crime? One day while sitting at my desk, I realized that the 6s fit PERFECTLY beneath my Mackie Big Knob Passive monitor controller, and could then be used easily as a remote for Logic Pro. I mean…as if it was ordained by heaven itself- perfection. Thus began my journey of attempting to create a stand for said iPhone 6s since there was nothing similar to what I needed online for a reasonable price.

In the picture above you’re able to get a good glimpse of what I was going for. I wanted the phone to blend in almost seamlessly to the Big Knob and appear, really, as an extension of the hardware. There were a number of obstacles preventing me from getting this project started. The first? I don’t own a protractor! How would I get the angles I needed for the cuts of the wood? I took measurements and attempted the math to determine the angles, but for some reason I couldn’t get the numbers to come out right…maybe that’s why I’m a musician? Anyway… I finally realized I could just unplug the Mackie and get the angles by conforming my mitre blade to the various edges.

The second obstacle? The ONLY saw I own is a mitre saw; a good one to own, but doesn’t perform well with small, very precise angled cuts like this. Or maybe I’m not a good carpenter? Again, perhaps the reason for taking up music! I battled with the monster for hours attempting to shave down angles and crooked cuts. I even had to construct wooden “holding” pieces to manipulate the stand since my fingers were getting way too close to the mitre saw while cutting, hence adding to the crooked cut issue.

I finally ended up with a wedge that was DECENT enough to work with, perhaps sand down enough to make it useable. I had to use a drill to notch out a hole that the camera lens could jut into, which you’ll see in the top left corner of the picture above. I then glued on a small lip to the front of the wedge to hold the phone in place, sanded, and spray painted the wedge black. The finished product turned out pretty decent!

Casio VL-Tone VL-1

If you’re looking for a nostalgic piece of gear that is unique, fun, AND pretty impressive for the price and size, look no further than the Casio VL-Tone VL-1! I recently picked one up used from Reverb. It was in pretty good cosmetic condition aside from a few scuffs and scratches here and there. Nothing major. The battery compartment has no corrosion, the LCD screen works beautifully, and the speaker still sounds pretty good. I paid a bit more than I’d hoped, and I later saw that if I had just waited a few weeks more would have been added to eBay, thus driving down prices. (LEARN FROM MY MISTAKES! There are TONS of these floating around.. check Mercari, eBay, Etsy, Reverb, etc..)

The only issue with the unit was that the keys felt a little sticky to me. There are a couple videos online detailing the general cleaning of the circuit board inside the VL-Tone, but nothing (that I could find) where the board had been removed in order to access the keys- so I was flying blind behind that board. I wasn’t sure what kind of mechanism I would find that might be fixed in order to relieve any key stick.

While I unfortunately did not snap a picture of the mechanism, the keys are simply sitting loosely in the holes on the face of the VL-Tone, and there are concave rubber contact behind each key, which when pressed by the key itself, makes contact with the circuit board. I gave the faceplate a good scrub with dawn, along with all the keys, buttons, switches, and the rubber key contact pads. I made sure to really scrub well in the key holes. I believe that the only reason for the keys sticking was that grime had built up in the key hole rims over time. After the thorough cleaning and reassembly the keys do not stick at all.

Overall, the Casio VL-Tone VL-1 is very simple to disassemble and reassemble. I plan to write a step-by-step guide in the near future detailing the teardown and all the nuances. The most challenging part that made me the most nervous was unseating the LCD screen, as it’s connected by such a thin cable. As long as you’re careful and patient, it’s no problem. Stay tuned for the teardown guide!

Tape Loop Experimentation

For the last few weeks I have been reading and watching a lot of videos about tape looping. I started thinking it could be a really cool and unique way to approach sampling and creating new sounds when I’m composing. After multiple failed trips to the local Goodwill to try and find a used tape player in good and working order,

I discovered the Panasonic RR-830 (below) which was created to function as a transcription machine. There are tape speed and VSC (Variable Speech Control) controls, which allow for greater manipulation of the tape in a live performance or even sampling setting. I found a unit in like-new condition on eBay for $60 and pulled the trigger. What I didn’t realize, was that this machine had an auto-stop function, meaning that if the left tape head didn’t move continuously, the machine would eventually stop playing the cassette. I was now in dire need of a fix!

After trying out a few workarounds I found online, including running a rubber band around the two tape spindles after removing the machine face (below) I finally discovered the perfect solution! It involved covering the two tape reels in blue painter tape (roughly 4-5 times around) and then running a size #32 rubber band around both reels (below). This obviously dictates that the tape then must be run around both reels as well, so it isn’t your typical 4-5 second tape loop routed around the right reel only. For some reason I couldn’t get the cassette to work super well with just the rubber band, which is why I added the tape. It does seem that the rubber band should have traction enough itself to be turned physically by the reels, so if you’re interested in trying this fix for yourself, you might try without tape first and maybe you’ll have better luck than me.

For a more detailed explanation into the issue with the Panasonic RR-830 and the fix I’ve come up with, check out the YouTube video I created below.